
Who doesn’t know them: pictures on which people or objects float. How does levitation photography work? How do you manage to photograph a breathtaking composition of floating people? In this tutorial, you will learn about levitation photography. Let the Magic happen!
Things Needed for Levitation Photography
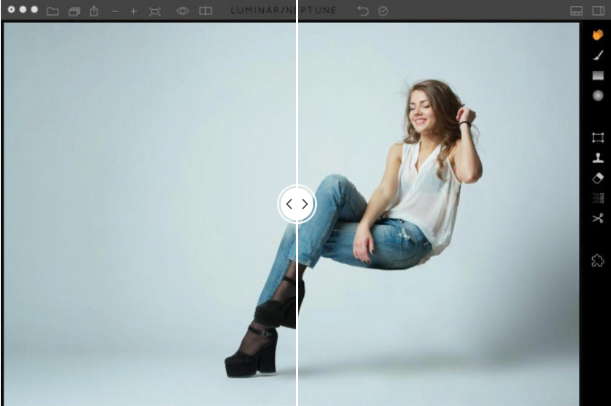
In advance: levitation photography is quite simple. Once the basic setup has been set up, and the camera settings have been made, it is also quite fast. It looks like witchcraft – but it is not. There are some tricky tasks later in the editing of the image. More on that later.
A Model or Object
The more contrastive the picture is in the end, the more impressive it looks. The model should at best wear a dress or pants with an intense color (e.g., red), without significant patterns and ornaments.
Chair, Table or Bar
To make the model stand out from the ground, you need an item that “enhances” the model or object.
Tripod
A tripod is necessary because you have to take a picture with the model and one without a shot later. The position of the camera may under no circumstances be changed for the two images.
Lens and Open Aperture
Camera and tripod not forgotten. Use a lens as a fixed focal length, or merely a wide-angle lens, with which you can open the aperture wide. With open iris your model gets sharp and the background blurred, which further enhances the suspension effect.
A Suitable Location
The more carefully you choose your location for the levitation shoot, the less effort is required in the post-processing. Do you want to create a mystical picture with a floating model in the forest? Or take a picture of a floating apple to start? Let your imagination run wild! Outdoor shootings are especially suitable because the surroundings and ultimately the image look very real.